So I've been frustrated with sewing clothing - The Weight - she comes and goes and changes ALL my measurements along the way. I have some serious body frustration issues going on right now, but I won't go into all that, at least not today. So not much fashion sewing going here. But, on the other hand, bags, totes, purses, carryalls, and as they are called here in my neck of the woods, pocketbooks, do not have to fit body parts that can't decide what size they want to be.*
Several weeks (months maybe) ago sewmamasew.com had an online sewing bee. I loved watching the competition and the projects that stemmed from that. One of them was this pocketbook - It's a Cinch Tote - you can find it here. Loved the look of this pattern, nice and roomy, kinda slouchy, had instructions for pockets, it's perfect for embellishing AND there was a coupon code. HA! and HA!
The pattern was a PDF download - can anyone say woohoo for instant gratification! There are no pattern pieces, per se, just instructions about what size pieces to cut out. I was OK with that, the pieces were all square and rectangular and anyone who has followed a quilt pattern should find it pretty easy. The instructions were great, very clear and easy to follow, the one gripe I did have is that the pictures do not line up with the corresponding picture. So if you, like me, tend to breeze along looking at the pictures/illustrations and only read the instructions when there is a question, this may cause a slight issue.
I made the bag as published the first time and over-all am very happy with it. I have been carrying it everyday since I finished it. One note - on the corners, when she says to be careful it is "layertastic" she's not kidding. I didn't quite get the layers on the corners lined up and had to open the lining and redo two of the corners, because of slippage. So without further ado -
My lovely daughter thought that I purchased this when she first saw it. Now she could be prejudiced, but she doesn't usually mind telling me (tactfully as possible) when I have missed the mark. I do really recommend this pattern and I plan on making it again soon, with a few changes of course.
Just because I thought it was pretty this morning, the view from my front porch -
Of course in the picture, you can't really see the lake just the mist rising off of it, but it is still pretty.
* that sounds like I'm hating my weight/size right now, and I'm not, not really. Overall I'm healthy, I just wish it would stabilize to make my sewing/fitting easier instead of changing for no apparent reason. Of course if I would be more active and improve my eating habits yada, yada, yada.......
Friday, October 25, 2013
Thursday, August 22, 2013
She wore a raspberry ....
I heard Raspberry Beret on the radio about 2 weeks ago and it is stuck IN. MY. HEAD!!
So I am dragging myself out of a sewing funk - kicking and screaming, but still coming out. AND I finally made myself take some pictures and some notes so I will know what I did and what to do differently next time.
This project was a combination of experiments. I used my Makebra DL01 pattern for the bra again. Still not entirely happy with it.
Changes -
Now comes the second part of the experiment - adding color. It's much easier to find everything in white so that's generally what I stock up on, but I really like a little color. Sometimes a lot of color, I think that's because my general public wardrobe is not very colorful. Anyway - I read on Beverly Johnson's blog years ago about using Kool-Aid as a dye. I couldn't find the blog entry again, but I have a set of white lingerie and I have black cherry Kool-Aid. Well all righty then lets give this a go!
I used hot tap water, enough to cover my material, and dumped the non-sweetened Kool-Aid in. Get the material wet anddump place gently in the pot also. The time in the water didn't seem to matter, it turned this color almost immediately and did not get any darker after 30-40 minutes.
So I give you raspberry lingerie.
So I am dragging myself out of a sewing funk - kicking and screaming, but still coming out. AND I finally made myself take some pictures and some notes so I will know what I did and what to do differently next time.
This project was a combination of experiments. I used my Makebra DL01 pattern for the bra again. Still not entirely happy with it.
Changes -
- The first one I made had a gap where the strap met the neckline edge, so this time I overlapped that area slightly - approximately 1/8" - effectively creating a small dart.
- I also used a thinner foam, 1/8" instead 1/4", which I do think I like better.
- I did not do a gothic arch on the bridge and I will do this next time. I really like this detail on my bras regardless of the pattern.
- I have gained some weight so the cup is a little small. I read somewhere that the down-n-dirty way to increase a cup size was to add 1/4" at the wireline. So will do this next time if I am at the same weight and size.
- The directions instruct you to sew a piece of twill tape or a thin ribbon to the outside edge of the strap. Next time I think I will also do on the neckline edge of the strap. It seemed to stretch out a little.
- Need to improve my skills in applying fold-over elastic.
Now comes the second part of the experiment - adding color. It's much easier to find everything in white so that's generally what I stock up on, but I really like a little color. Sometimes a lot of color, I think that's because my general public wardrobe is not very colorful. Anyway - I read on Beverly Johnson's blog years ago about using Kool-Aid as a dye. I couldn't find the blog entry again, but I have a set of white lingerie and I have black cherry Kool-Aid. Well all righty then lets give this a go!
I used hot tap water, enough to cover my material, and dumped the non-sweetened Kool-Aid in. Get the material wet and
So I give you raspberry lingerie.
It turned out with an almost tie-dyed look. The fiber reactive dyes give a more even look. But this was an experiment and I kinda like it. We'll see how the color holds up after a few washes. I wish I could tell you I hand wash all my lingerie, but I'd be lying.
Happy Sewing, Suzanne
Wednesday, February 20, 2013
De-railed...
As in the SWAP has been sidetracked, stalled, and de-railed. Mostly because life and work is really busy right now and I have not been able to sew like I wanted. Also, because the new workout program seems to shifting things around - I lost not 1 single pound, but my measurements, they are a-changin'. Now quite frankly, I'm having trouble hitting a stationary target, not really willing to try hitting a moving one, so I will come back to the plan when things have stabilized somewhat.
So in the meantime, I celebrated Dead Bra Day. I was several days late, but you celebrate on February 13th by throwing out all your bras and undies that are past their expiration date. That makes room for the new ones you will receive for Valentine's! My lingerie drawer is not surprisingly bare, so I have set out to make some new (badly needed) sets to restock my drawer.
I have pulled out my bra patterns, remeasured and retraced, in a couple of cases completed a little re-grading, and started cutting. I will be using my Danglez DB5, Sewy Rebecca, MakeBra DL01, and a couple of Russian patterns that can be found here for free. I don't read even one single syllable of Russian, but with translate.google.com and a little previous experience, I managed to muddle through.
I am going to try some new (to me) patterns for the undies - there are several free and cheap patterns out there that look really nice. MakeBra has one (cheap, I thought and downloadable, so instant gratification), ClothHabit has a free pattern, 'So, Zo also has a free pattern, and of course there is Burda's cheekie panties pattern. There is also my standby Ottobre pattern from 5/2009 issue.
Hopefully sewing and pictures to follow. Suzanne
So in the meantime, I celebrated Dead Bra Day. I was several days late, but you celebrate on February 13th by throwing out all your bras and undies that are past their expiration date. That makes room for the new ones you will receive for Valentine's! My lingerie drawer is not surprisingly bare, so I have set out to make some new (badly needed) sets to restock my drawer.
I have pulled out my bra patterns, remeasured and retraced, in a couple of cases completed a little re-grading, and started cutting. I will be using my Danglez DB5, Sewy Rebecca, MakeBra DL01, and a couple of Russian patterns that can be found here for free. I don't read even one single syllable of Russian, but with translate.google.com and a little previous experience, I managed to muddle through.
I am going to try some new (to me) patterns for the undies - there are several free and cheap patterns out there that look really nice. MakeBra has one (cheap, I thought and downloadable, so instant gratification), ClothHabit has a free pattern, 'So, Zo also has a free pattern, and of course there is Burda's cheekie panties pattern. There is also my standby Ottobre pattern from 5/2009 issue.
Hopefully sewing and pictures to follow. Suzanne
Tuesday, January 15, 2013
SWAP v1.0
I have a plan! And now if you promise not to laugh -
My drawing is atrocious, but it keeps me on track. As stated previously this plan is subject to change, especially since I am having problems fitting the Ottobre pencil skirt. The first time sewing it up in my normal size - the waist and upper hips are about 3" too big. So I unsew (and I hate that!), tape the waist with some twill tape, and bring in the side seams, at the waist easing back to the original seams, slightly less than 3/4" for a total of slight less than 3", leaving just a little ease. Now it feels OK, but there are slight drag lines around the hip area and I didn't change that part. I really hate unsewing and the fabric was not special to me, so I'm thinking about donating this one and trying again with a different pattern.
Planned fabric is completely from the stash - WooHoo! smug self-congratulations ensue ;).
So that's it for now, Happy Sewing, Suzanne
Wednesday, January 9, 2013
Not SWAP
So this doesn't have anything to do with the SWAP, which I still want to do, but this is the first thing I've finished this year.
The pattern is the downloadable DL01 found at makebra.com. I am always on the lookout for "new and improved", not to say the patterns I have been using are not good, they are and I recommend them. But this one was different and also very good.
This pattern uses a bonded foam to shape the cups. I thought the pattern was very well drafted and true to the given measurements. I usually have use the given measurements to find the starting size and then go down a band size and up a cup size. There is lots of useful infomation on the blog about constructing her patterns and making a trial bra. Which I did! that's probably a first. It seemed to fit pretty well, so off I went to make a sample wearable bra.
The whole time I was making this, I was thinking about the black & white jumpsuits they make inmates wear, but the first time DD saw what I was doing she said "Beetlejuice!" So prison wear or Beetlejuice, take your pick. The instructions call for fold-over elastic on the upper edge of the cups and the underarm edge. I, however, am not fond of fold-over elastic nor sure of my ability to apply it even reasonably well, so I added seam allowance to those edges and applied plush elastic to underarm edge like normal and the pretty lacy picot to upper cup edge. This theory, as is quite often the case, worked better in my head than in practice.
This bra was made with a 1/8" foam and I'm not sure I like it. I have since ordered and received a 1/16" foam that I will use for the next one. I'm giving it the wear test today and have come to the following conclusions - 1. the underarm edge is just a little to high to be comfortable, I was aware to it all day, 2. I need to work on the upper cup edge, there is gaping between me and the bra. This may by operator inefficiency, so I will try again as drafted with the thinner foam and I may have to get over myfear dislike of fold-over elastic. 3. the band fits perfectly with a small downward hike ala Beverly Johnson.
The pattern is the downloadable DL01 found at makebra.com. I am always on the lookout for "new and improved", not to say the patterns I have been using are not good, they are and I recommend them. But this one was different and also very good.
This pattern uses a bonded foam to shape the cups. I thought the pattern was very well drafted and true to the given measurements. I usually have use the given measurements to find the starting size and then go down a band size and up a cup size. There is lots of useful infomation on the blog about constructing her patterns and making a trial bra. Which I did! that's probably a first. It seemed to fit pretty well, so off I went to make a sample wearable bra.
The whole time I was making this, I was thinking about the black & white jumpsuits they make inmates wear, but the first time DD saw what I was doing she said "Beetlejuice!" So prison wear or Beetlejuice, take your pick. The instructions call for fold-over elastic on the upper edge of the cups and the underarm edge. I, however, am not fond of fold-over elastic nor sure of my ability to apply it even reasonably well, so I added seam allowance to those edges and applied plush elastic to underarm edge like normal and the pretty lacy picot to upper cup edge. This theory, as is quite often the case, worked better in my head than in practice.
This bra was made with a 1/8" foam and I'm not sure I like it. I have since ordered and received a 1/16" foam that I will use for the next one. I'm giving it the wear test today and have come to the following conclusions - 1. the underarm edge is just a little to high to be comfortable, I was aware to it all day, 2. I need to work on the upper cup edge, there is gaping between me and the bra. This may by operator inefficiency, so I will try again as drafted with the thinner foam and I may have to get over my
WooHoo - overall a win on the new pattern!
Happy Sewing, Suzanne
Friday, January 4, 2013
It's a New Year!
As I may have mentioned before, I love the new year - it's so full of promise and potential. Last year also proved to be slightly problematic. Oh well...
It's also SWAP (Sewing With A Plan) time again and since I got so far on last year's, that is to say not even off the starting block. (I started out working on trying to get the perfect T-shirt, I thought I had it, but really still working on it.) This year's SWAP deals with 2 capsules of 4-5 garments each and 1 bridging garment. This is much easier for me to wrap my head around since trying to get all 11 garments to work with each other nearly drove me crazy(ier) in past years. You can find the official rules here.
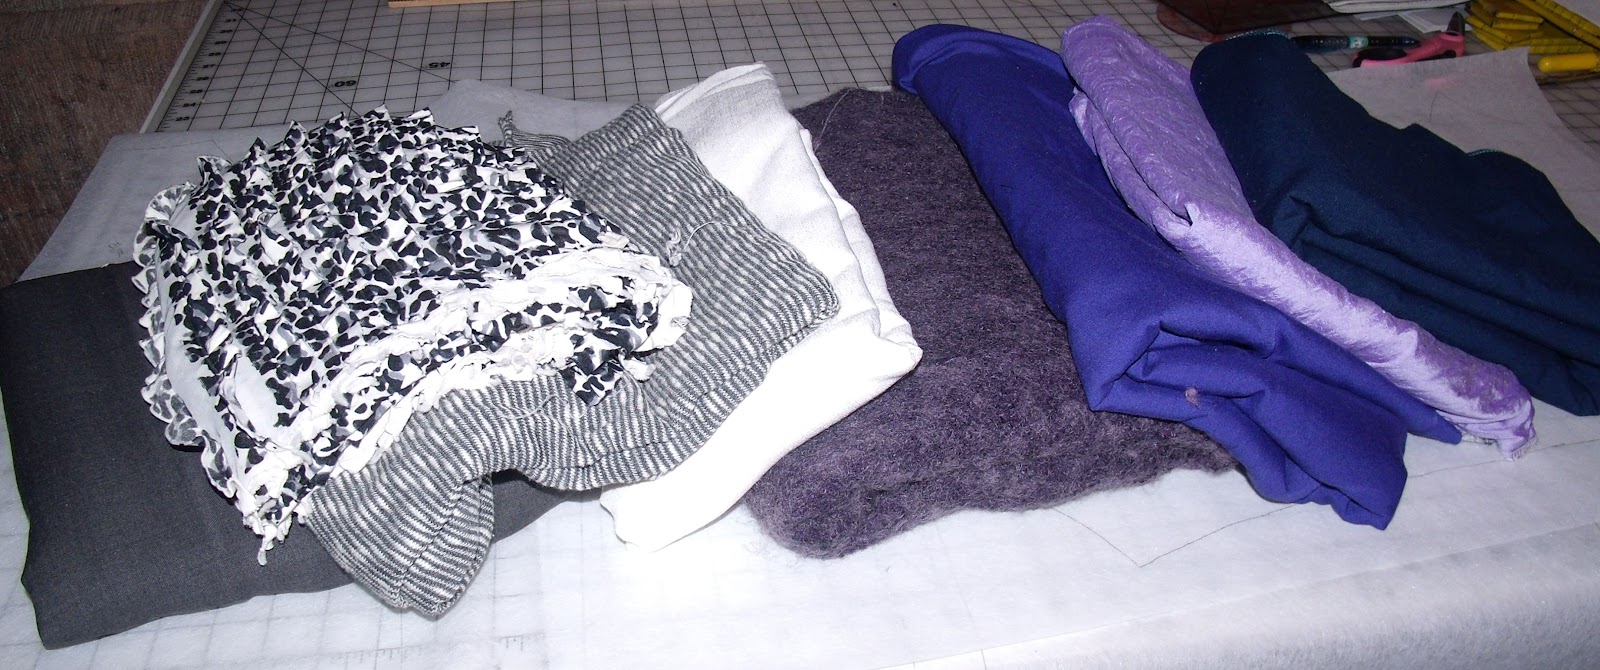
And I have a plan, which is subject to change without notice yada, yada.... I intend to work completely, or a least mostly, from my stash.* I am going to use gray & navy as my base colors, with splashes of purple, lilac, plum & white. I'm pretty sure everything I have planned will work together and be extremely useful in my real life.
I don't have a name yet and will try to get a picture of the fabrics and patterns for the next post.
*One of commitments this year is sew down the stash. It's probably not that large, but it's getting overwhelming to me.
It's also SWAP (Sewing With A Plan) time again and since I got so far on last year's, that is to say not even off the starting block. (I started out working on trying to get the perfect T-shirt, I thought I had it, but really still working on it.) This year's SWAP deals with 2 capsules of 4-5 garments each and 1 bridging garment. This is much easier for me to wrap my head around since trying to get all 11 garments to work with each other nearly drove me crazy(ier) in past years. You can find the official rules here.
And I have a plan, which is subject to change without notice yada, yada.... I intend to work completely, or a least mostly, from my stash.* I am going to use gray & navy as my base colors, with splashes of purple, lilac, plum & white. I'm pretty sure everything I have planned will work together and be extremely useful in my real life.
I don't have a name yet and will try to get a picture of the fabrics and patterns for the next post.
*One of commitments this year is sew down the stash. It's probably not that large, but it's getting overwhelming to me.
Friday, November 30, 2012
I'm BAAACK!
I'm a lousy blogger, I was lousy at journaling when I was a kid too. Every new year I would start to keep a journal and would faithfully write everyday for about 2 weeks, then 2-3 times a week, then every 2-3 weeks, then nothing, zip, zero, nada. I wish I had done better with that after reading some of my grandmother's journals, anywhoo. I have been sewing, just not journaling about it - life you know. Both DH and my parents have been having health issues that take a lot of our free time.
I digress, so back to being a better blogger, back in October I was picked as one of testers for Sewaholic's new Cordova jacket pattern. It was the first time I have used one of her patterns and gotta say, the experience was ah-ma-zing. Even in the trial stage, the instructions, illustrations, and pattern pieces were great. Especially the illustrations, which while we're being honest here, I will admit to using more than the written instructions. I pretty much only read instructions after running into trouble, which I know would eliminate a good bit of operator error, but still.

So this is a great jacket pattern,"fitted with princess seams and features a peplum detail, pleats at the sleeve cap , and a zip front closure." I actually made a muslin for this, before cutting into my good fabric and still I think the shoulders are a tad too big. It's an easy fix for future makes - at first I thought I would go to a smaller size, but really looking at the pictures I think maybe taking a larger seam allowance in the shoulders and a little additional shaping in the waist should fix it.
I used a silk blend fabric that I got from Casual Elegance fabrics several years ago and acetate lining from Fabric Mart Fabrics.
I did have to shorten the waist,(to be 5'10" I am ridiculously short-waisted) but other than that no changes. As I stated before, I will make a few additional one next time.
Just wanted to say, that I am pretty sure that I am not in Tasia's targeted demographic. I'm guessing I'm older by about 15+ years and I'm not exactly pear-shaped. I still recommend that you run, not walk to your nearest source of Sewaholic patterns and give this one a try.
Happy Sewing, Suzanne
I digress, so back to being a better blogger, back in October I was picked as one of testers for Sewaholic's new Cordova jacket pattern. It was the first time I have used one of her patterns and gotta say, the experience was ah-ma-zing. Even in the trial stage, the instructions, illustrations, and pattern pieces were great. Especially the illustrations, which while we're being honest here, I will admit to using more than the written instructions. I pretty much only read instructions after running into trouble, which I know would eliminate a good bit of operator error, but still.
So this is a great jacket pattern,"fitted with princess seams and features a peplum detail, pleats at the sleeve cap , and a zip front closure." I actually made a muslin for this, before cutting into my good fabric and still I think the shoulders are a tad too big. It's an easy fix for future makes - at first I thought I would go to a smaller size, but really looking at the pictures I think maybe taking a larger seam allowance in the shoulders and a little additional shaping in the waist should fix it.
I used a silk blend fabric that I got from Casual Elegance fabrics several years ago and acetate lining from Fabric Mart Fabrics.
I did have to shorten the waist,(to be 5'10" I am ridiculously short-waisted) but other than that no changes. As I stated before, I will make a few additional one next time.
And my flasher pose - so you can see the lining of course!
Just wanted to say, that I am pretty sure that I am not in Tasia's targeted demographic. I'm guessing I'm older by about 15+ years and I'm not exactly pear-shaped. I still recommend that you run, not walk to your nearest source of Sewaholic patterns and give this one a try.
Happy Sewing, Suzanne
Subscribe to:
Posts (Atom)